发布时间:2022-04-19
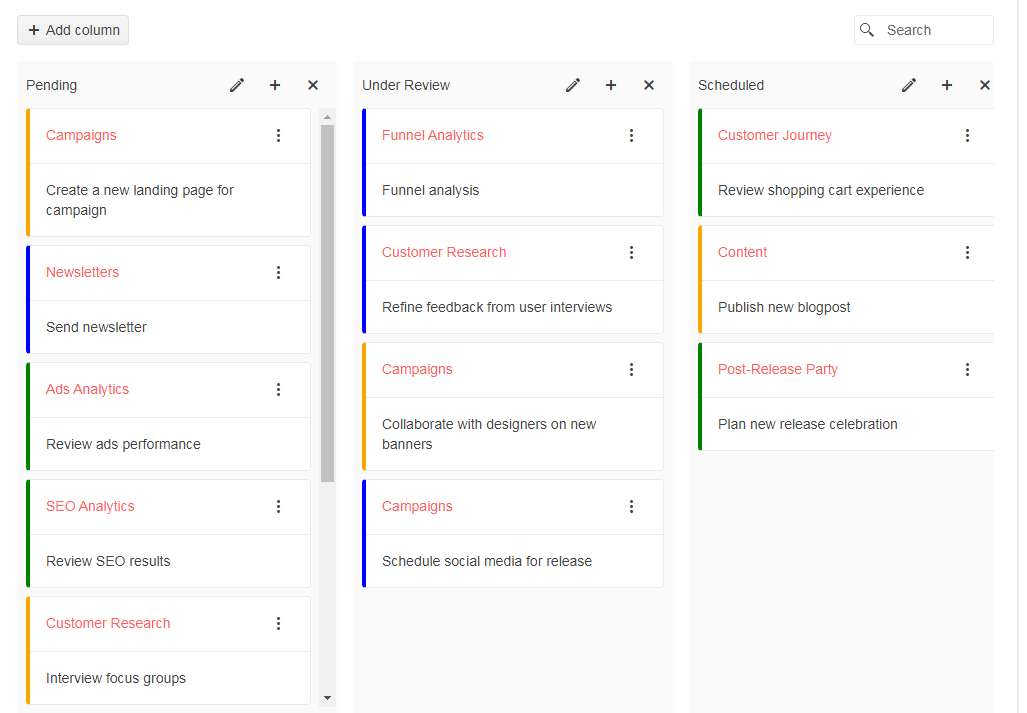
Kendo UI TaskBoard允许列和卡片编辑,默认情况下,列和卡片都启用了TaskBoard中的编辑。
要设置编辑:
1. 配置TaskBoard的transport和schema数据源选项。
2. 设置editable配置(可选)。
以下示例演示如何为 TaskBoard 的列和卡片配置 CRUD(创建、读取、更新、销毁)数据操作。
<div id="taskBoard"></div>

<script>
var crudServiceBaseUrl = "https://demos.telerik.com/kendo-ui/service";

var priorities = new kendo.data.DataSource({
data: [
{ value: "urgent", text: "Urgent", color: "orange" },
{ value: "highpriority", text: "High Priority", color: "blue" },
{ value: "lowpriority", text: "Low Priority", color: "green" }
]
});

$("#taskBoard").kendoTaskBoard({
columnSettings: {
dataTextField: "Text",
dataStatusField: "Status",
dataOrderField: "Order"
},
columns: {
transport: {
read: {
url: crudServiceBaseUrl + "/taskboard/columns"
},
create: {
url: crudServiceBaseUrl + "/taskboard/columns_create",
method: "POST"
},
update: {
url: crudServiceBaseUrl + "/taskboard/columns_update",
method: "POST"
},
destroy: {
url: crudServiceBaseUrl + "/taskboard/columns_destroy",
method: "POST"
}
},
schema: {
model: {
id: "ID",
fields: {
"ID": { type: "number" },
"Text": { type: "string" },
"Status": { type: "string", defaultValue: "todo" },
"Order": { type: "number" }
}
}
}
},
dataCategoryField: "Category",
dataDescriptionField: "Description",
dataTitleField: "Title",
dataStatusField: "Status",
dataOrderField: "Order",
dataSource: {
transport: {
read: {
url: crudServiceBaseUrl + "/taskboard"
},
create: {
url: crudServiceBaseUrl + "/taskboard/create",
method: "POST"
},
update: {
url: crudServiceBaseUrl + "/taskboard/update",
method: "POST"
},
destroy: {
url: crudServiceBaseUrl + "/taskboard/destroy",
method: "POST"
}
},
schema: {
model: {
id: "ID",
fields: {
"ID": { type: "number" },
"Category": { type: "string", defaultValue: "lowpriority" },
"Description": { type: "string" },
"Title": { type: "string", validation: { required: true } },
"Status": { type: "string", defaultValue: "todo" },
"Order": { type: "number" }
}
}
}
},
resources: [{
field: "Category",
title: "Priority",
dataSource: priorities
}],
previewPane: {
template: "<p>#:Description#</p>" +
"<p>#:resources.Category.title#: <span style='background-color: #:resources.Category.color#'> </span> #:resources.Category.text#</p>"
},
editable: {
form: {
buttonsTemplate: "",
items: [{
field: "Title",
label: "Title:"
}, {
field: "Description",
label: "Description:"
}, {
field: "Category",
label: "Priority:",
editor: "DropDownList",
editorOptions: {
dataTextField: "text",
dataValueField: "value",
dataSource: priorities,
template: "<span style='background-color: #:color#'> </span> #:text#",
valueTemplate: "<span style='background-color: #:color#'> </span> #:text#"
}
}]
}
},
height: 750
});
</script>
TaskBoard 为其列和卡片使用两个不同的数据源实例。
注意:
以下示例演示如何配置列的数据源。
columns: {
transport: {
read: {
url: "https://demos.telerik.com/kendo-ui/service/taskboard/columns"
},
create: {
url: "https://demos.telerik.com/kendo-ui/service/taskboard/columns_create",
method: "POST"
},
update: {
url: "https://demos.telerik.com/kendo-ui/service/taskboard/columns_update",
method: "POST"
},
destroy: {
url: "https://demos.telerik.com/kendo-ui/service/taskboard/columns_destroy",
method: "POST"
}
},
schema: {
model: {
id: "ID",
fields: {
"ID": { type: "number" },
"Text": { type: "string" },
"Status": { type: "string", defaultValue: "todo" },
"Order": { type: "number" }
}
}
}
}
以下示例演示如何配置卡片的数据源。
dataSource: {
transport: {
read: {
url: "https://demos.telerik.com/kendo-ui/service/taskboard"
},
create: {
url: "https://demos.telerik.com/kendo-ui/service/taskboard/create",
method: "POST"
},
update: {
url: "https://demos.telerik.com/kendo-ui/service/taskboard/update",
method: "POST"
},
destroy: {
url: "https://demos.telerik.com/kendo-ui/service/taskboard/destroy",
method: "POST"
}
},
schema: {
model: {
id: "ID",
fields: {
"ID": { type: "number" },
"Category": { type: "string", defaultValue: "lowpriority" },
"Description": { type: "string" },
"Title": { type: "string", validation: { required: true } },
"Status": { type: "string", defaultValue: "todo" },
"Order": { type: "number" }
}
}
}
}
默认情况下启用编辑,但可编辑配置公开了许多自定义选项。
以下示例演示了如何设置editable配置。
editable: {
form: {
buttonsTemplate: "",
items: [{
field: "Title",
label: "Title:"
}, {
field: "Description",
label: "Description:"
}, {
field: "Category",
label: "Priority:",
editor: "DropDownList",
editorOptions: {
dataTextField: "text",
dataValueField: "value",
dataSource: priorities,
template: "<span style='background-color: #:color#'> </span> #:text#",
valueTemplate: "<span style='background-color: #:color#'> </span> #:text#"
}
}]
}
}
Kendo UI for jQuery是完整的jQuery UI组件库,可快速构建出色的高性能响应式Web应用程序。Kendo UI for jQuery提供在短时间内构建现在Web应用程序所需要的一切,从多个UI组件中选择,并轻松地将它们组合起来,创建出酷炫响应式的应用程序,同时将开发时间加快了50%。
 023-68661681
 返回
返回